
Time flies. Today was our last day mud hut building at the Home for AIDS Orphans in Zambia. We have Sunday here but “off” from building with a few final activities planned. On Monday we make a side trip to Botswana with the Brits on a 2 day safari. Then Adam arrives and we shift from “volunteer Africa” to “vacation Africa.” I assume – though I could be wrong – that vacation Africa will have a lot less mud.
Our 10 day volunteer & home building experience has pretty much been focused on mud: Smoothing mud. Flooring mud. Mixing mud. Making mud balls to serve as the inner foundation of walls.
Wet mud. Dry mud. Sand. Dirt. Buckets of water. We’ve handled it. We’ve stirred it. We’ve mixed it. We’ve sat in it. We’ve gotten it smeared in our hair and on our faces. We’ve accidentally had pieces drop in our mouth. And on our glasses.
But we’ve also made a productive contribution with it too. Each of the houses will go to a grandmother or aunt who is raising children orphaned by a member of their extended family. (Most often, the mother has died…and the father has either died too or is working in a different far away city or village.)

Margaret and several of her grandkids that she cares for
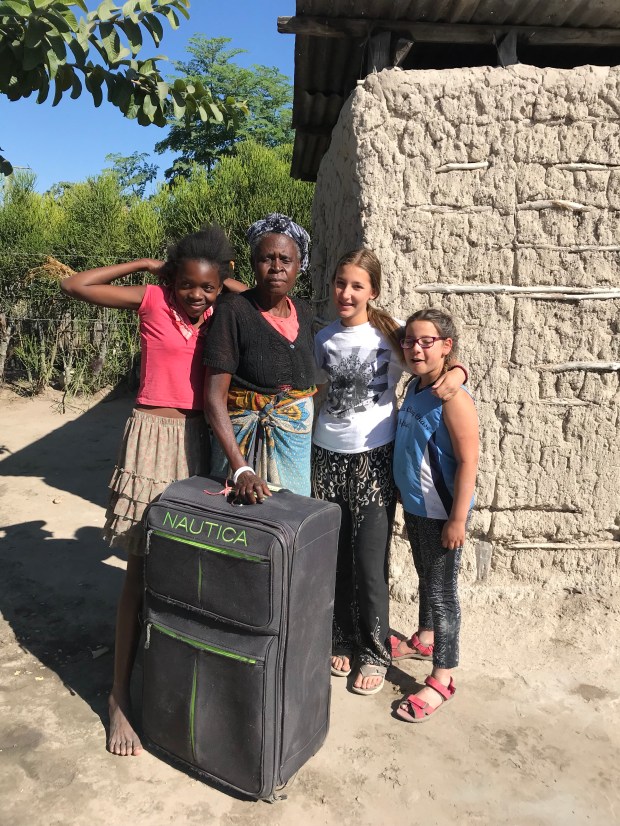
We gave Margaret one of the suitcases we traveled here with, to make her move day easier
Mud hut building: the process as we understand it
In the past 10 days we learned about the process of mud hut building. In reverse order because we arrived as the former volunteers were finishing a house, and the next day started work on a new one. But we will try to show this to below in a more chronological order to show how these might hot houses are built.
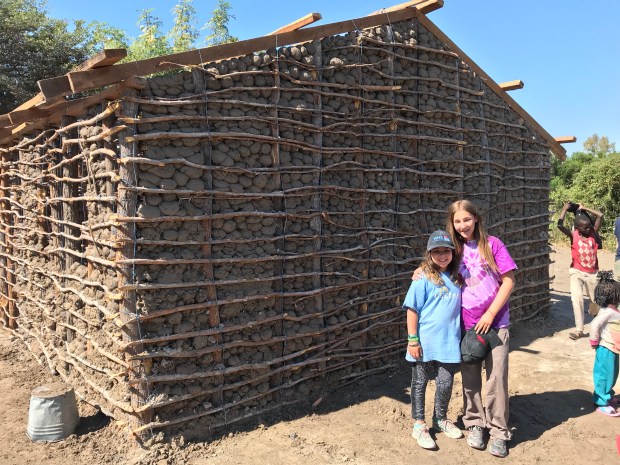
Step 1: Beams and poles
First, some more experienced local staffers with Home for Aids Orphans build the wood frame, which is a series of tall poles and a structure to hold the roof. This is the only non-mud part, and the only part that the girls really could not participate in because of all the need for heavy lifting and hammering and nails…
Once the frame is up one of the many mud steps can begin!
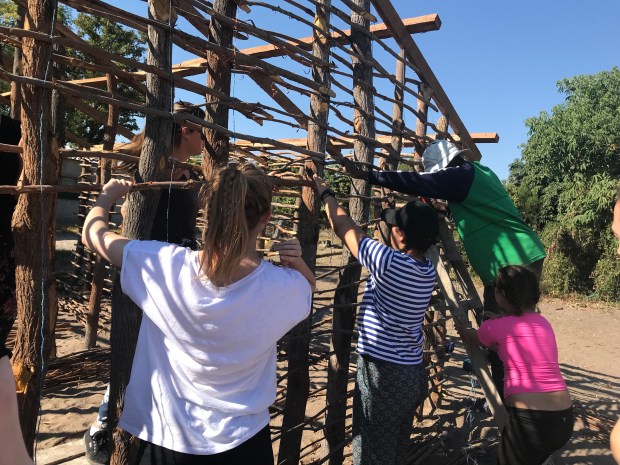
Step 2: Sticks and String
To forge the house, long pieces of wood branches are threaded around the tall wood poles and secured via a system of knots and string. Some volunteers hold the wood beams in place, others tie the wood in place via a series of knotted string. The girls got the hang of the knots right away and were able to jump right in.
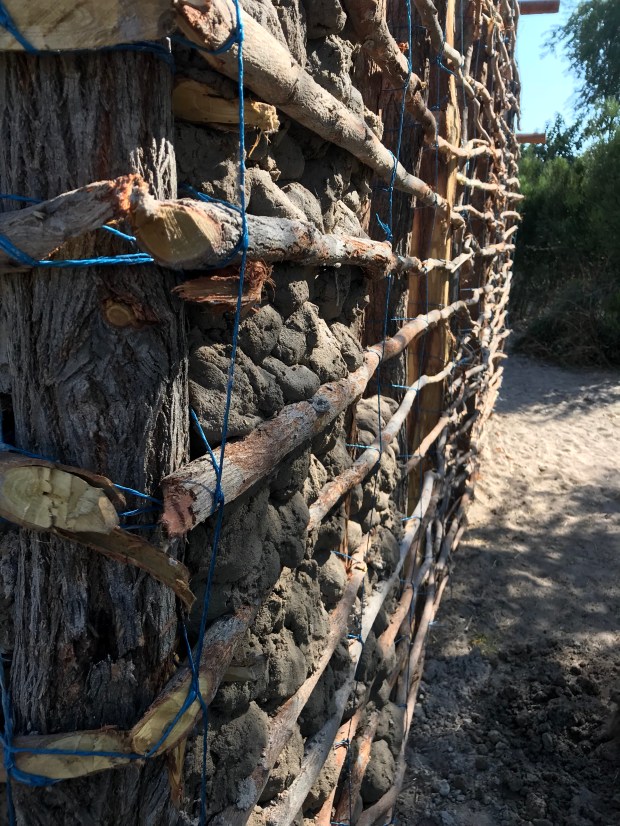
Step 3: Mud ball making
Now that we had the core structure, we start filling it in. With large balls of mud. We start each day stirring together dirt and water to get mud at just the right consistency to craft a firm ball. Place said balls within each rectangular area demarcated by the wood and string.
The British girls were very singularly focused on working as a team and completing a full wall from bottom to top.
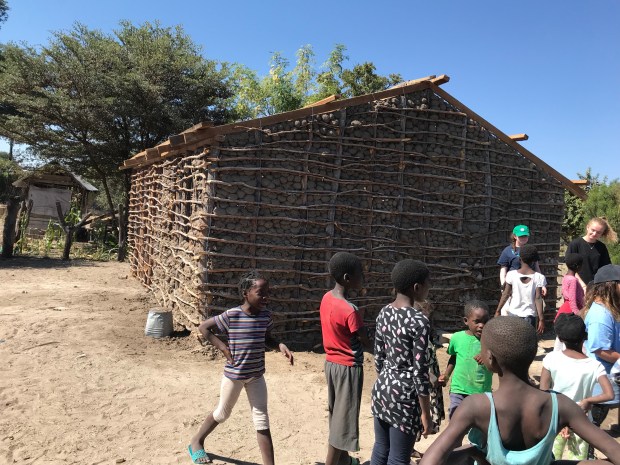
We Duckers were interested in that too. But also interested in interacting with the dozens of curious children who came to stare at us each day, yelling “makua” (white person) and “what is your name?”
Me and my girls invited the other kids to make mud balls with us. So that rather than just staring at us, they were interacting with us and gaining some conversational English. (Most learn English in school, so many could understand what we were saying…but had a difficult time responding.) We talked about buckets and shovels, big mud balls and small, too wet or too dry, etc. All the while, we made mud balls and put them in place.

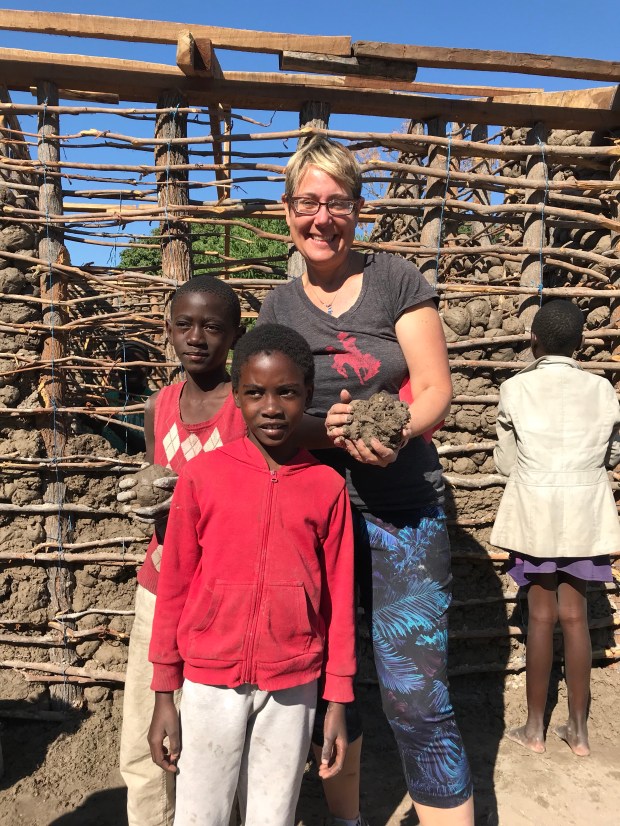
Not surprisingly, small hands don’t easily make the large mud balls needed. Our side had smaller mud balls, some of which crumbled, so our process was slower.
But for sure, our relationships with the local kids were deeper.


Step 4: Mud throwing
We missed this step on both houses we worked on. But apparently once the interior mud balls are all in place and sufficiently dry, then we would “throw” layers of mud on top to start creating the inner and outer walls.
Step 4: Smoothing
Once a thick layer of mud is thrown, now is time to smooth it out to make it even, flat and pretty. The smoothing takes slow deliberate palm and finger work with mud that is just the right sorta wet. We did some wall smoothing on our first day volunteering. It was not “hard” work, though doing it just right was sure difficult. I did notice that after we had “smoothed” a portion of a wall, Margaret (the grandma who would move into this particular house with her grandkids) would go over they same portion herself, smoothing out our smoothing.

Step 5: Flooring
The floor also required a thick smooth layer of mud.
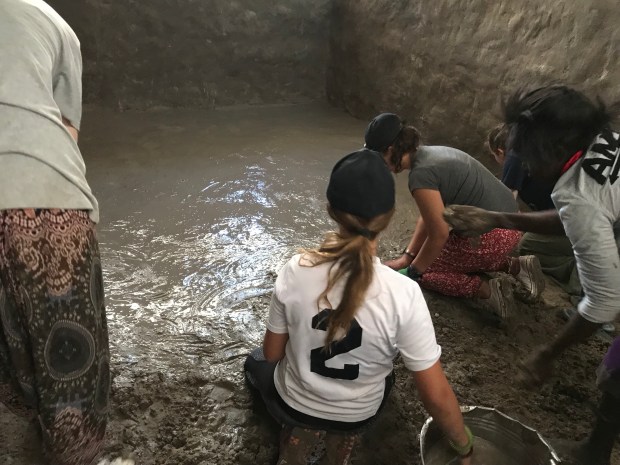
And the outside perimeter of the house an extra thick mud layer for rain resistance.

Missing the mud
For all our planning ahead, we didn’t really know EXACTLY what we would be doing. And I’m sure the description above is such a gross oversimplification that many may say that whatever we did, we did wrong.
But we felt good about it.
We had fun.
We made friends, ages and languages and accents aside.
We learned a ton.
And I hope we taught a ton too!
We’re a bit sad this this part of the trip is over. But we’ll have lots more CrazyTraveler adventure updates to share from here in Mwandi, Botswana and beyond…
